In SharePoint Online an app can be easily created using PowerApps to manage data. In this post I want to show you how to create cascading drop downs in an app and save the data back to SharePoint.
Start with three lists:
- Location list – location
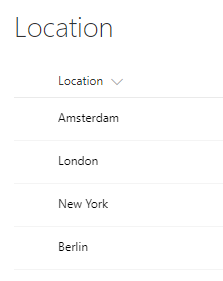
Figure 1 – contents of Location list - Training list – training name, lookup to location, price
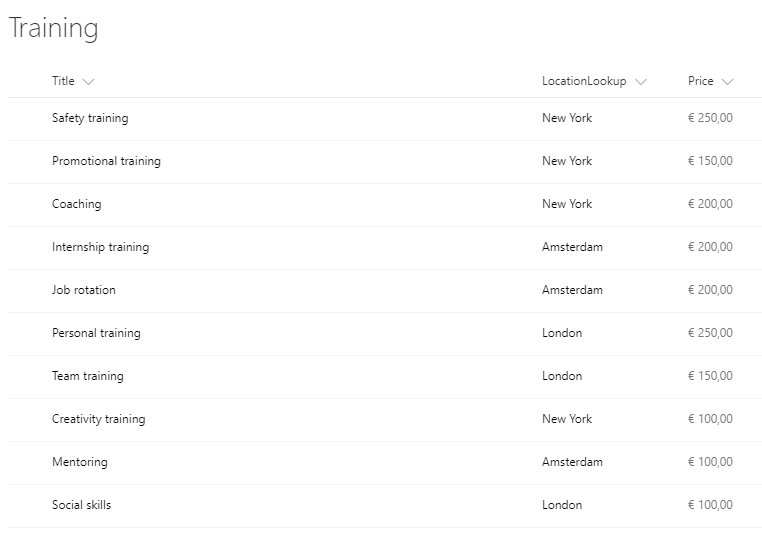
Figure 2 – Contents of Training list - Schedule list – lookup to location and training; schedule date
No content yet.
Purpose
The purpose is to create a screen in the PowerApps app to select a Location and after the selection the items shown in the Training drop down will be narrowed to the trainings defined at the specified location in the Training list. To fulfill the schedule a date can be filled and the item can be saved to the list in SharePoint.
Create an app
From the Schedule list in SharePoint create a new PowerApp.
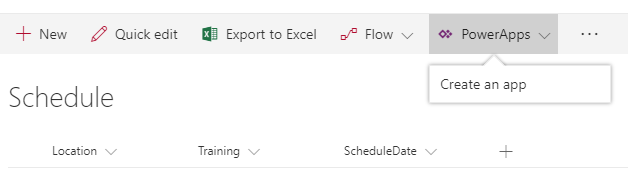
Figure 3 – create an app
Give the app a name and select ‘Create’.
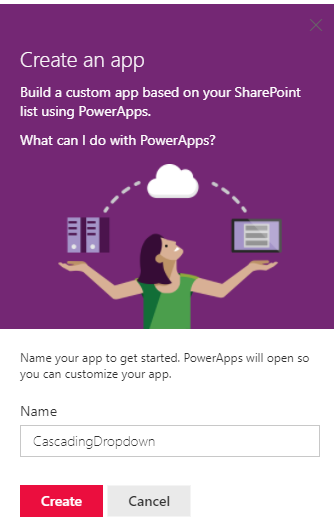
Figure 4 – name the app
PowerApps is building the app out of the box with three screens: browse, detail and edit. The app is now fully functional and can be tested by selecting the Preview button (Play) in the top right of the screen.

Figure 5 – the Preview button
The app shows no data, because there is no data in the Schedule list.
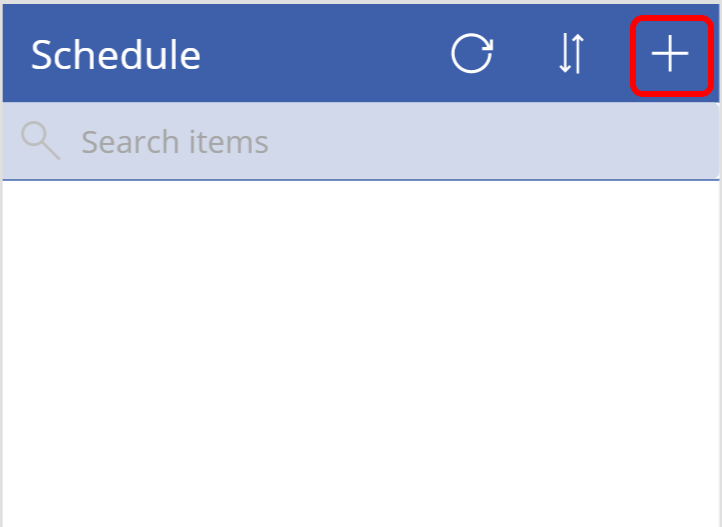
Figure 6 – browse screen
The Plus sign can be selected to navigate to the EditScreen in ‘New Item’ mode and a new item can be added to the list.
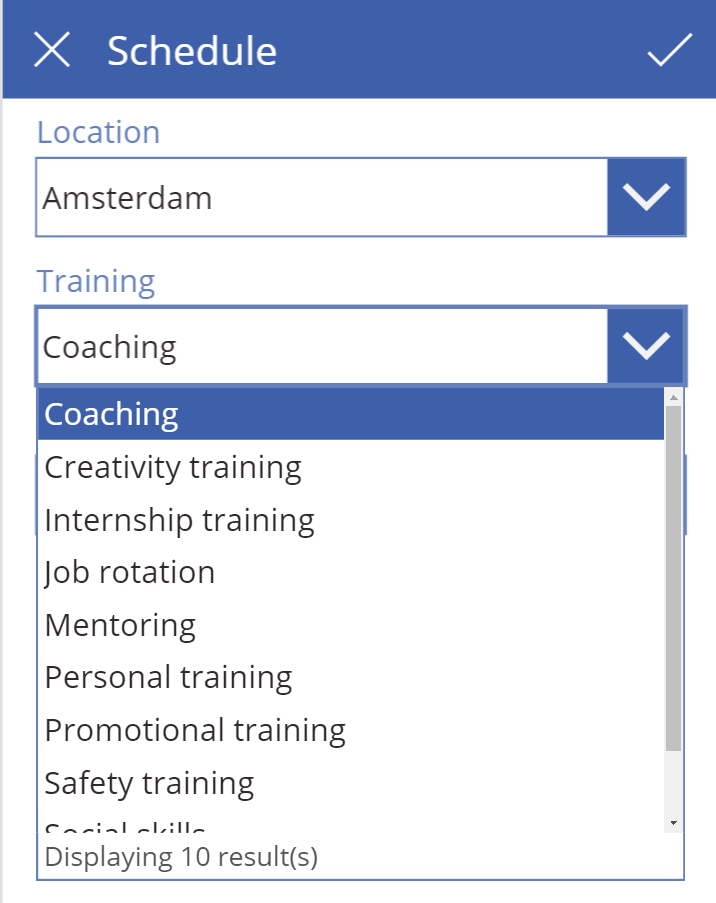
Figure 7 – select a Training
After selecting a Location all items in the Training list are displayed to select from. Select one and fill in a date and the item can be saved to SharePoint.
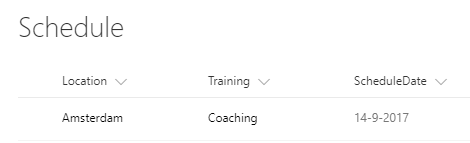
Figure 8 – item saved to SharePoint
This is what you get in the out of the box PowerApp created from the Schedule list:
a functional app bound to the data source selected from where the app was created in SharePoint.
Cascading drop downs
To create the cascading drop downs functionality the approach is a bit different. The Schedule list has no knowledge of what Training is given in what Location. The Training list is. The Training list doesn’t has to be aware of all Locations. The Locations list is.
The easiest approach is to create a new Form screen from the Insert tab, New Screen button.

Figure 9 – new form screen
This screen consists of an EditForm and some controls, like the icons left and right at the top, the title label and the rectangular blue bar at the top.
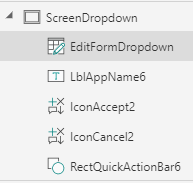
Figure 10 – Contents of a screen
Controls have to be added to the screen (not the edit form! Make this control smaller if there isn’t any room left on the screen) to be able to select a Location and a Training by selecting Controls, Drop down from the Insert tab.
The drop downs have to be connected to two different data sources:
The Location drop down has to be bound to the Location list.
The Training drop down has to be bound to the Training list.
To do so select Data source from the View tab, connect to the appropriate SharePoint sites and add the two lists mentioned.
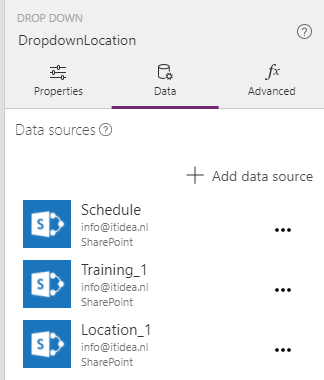
Figure 11 – add data sources
The ‘_1’ is added because the name is already been used by the ootb PowerApp created.
To bind the Location drop down to the appropriate data source you have to select the drop down, select the property ‘Items’ and put in the value ‘Location_1’. The drop down is populated right away.
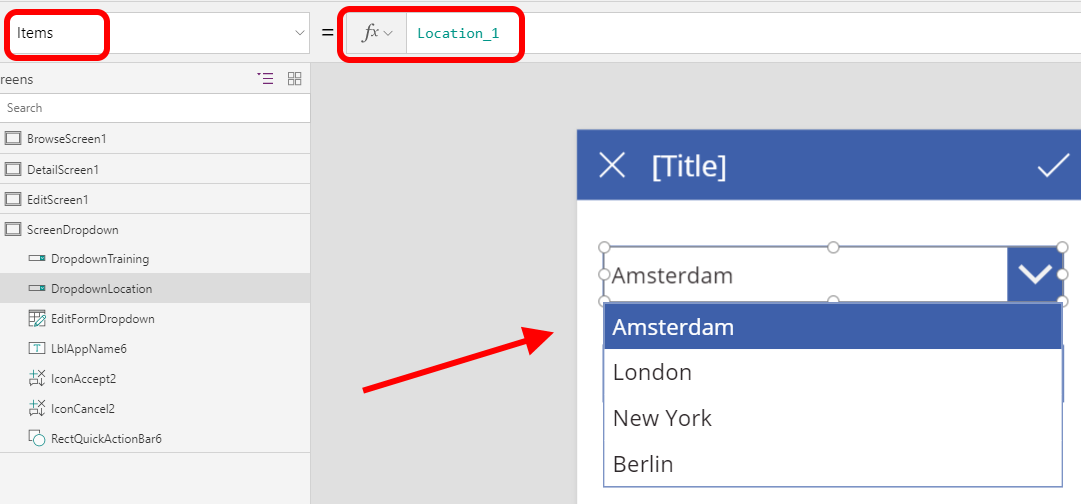
Figure 12 – bind a drop down to a data source
To create the cascading functionality the binding of the Training drop down will be dependent of the selection of the Location drop down.
The ‘Items’ property has to Filter the Training_1 data source where the selected Location in the drop down is the same as the Location lookup value in the Training_1 data source (=the Training list in SharePoint). The formula has to be:
Filter(Training_1,LocationLookup.Id = DropdownLocation.Selected.ID)
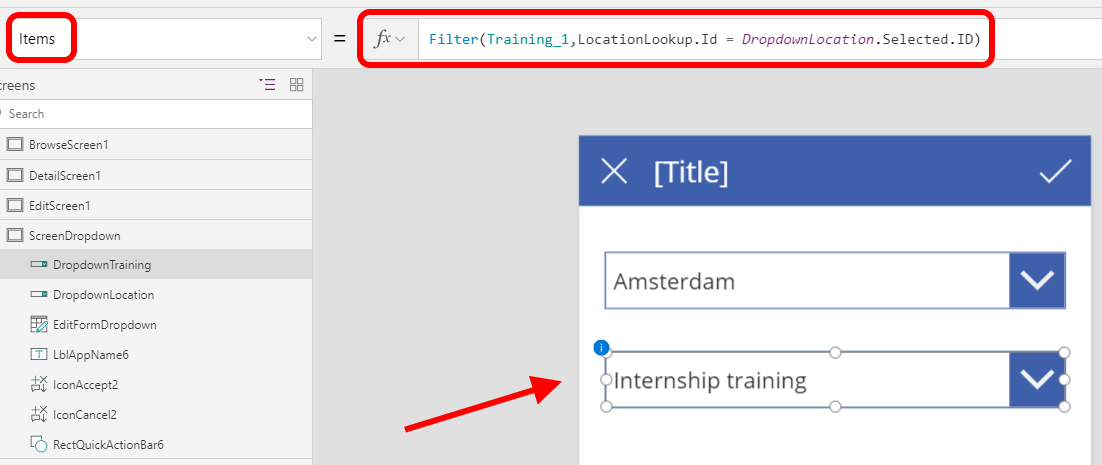
Figure 13 – cascading drop down
Hit the Preview button (Play) in the top right of the screen to see this working in the browser, but it works in design mode already.
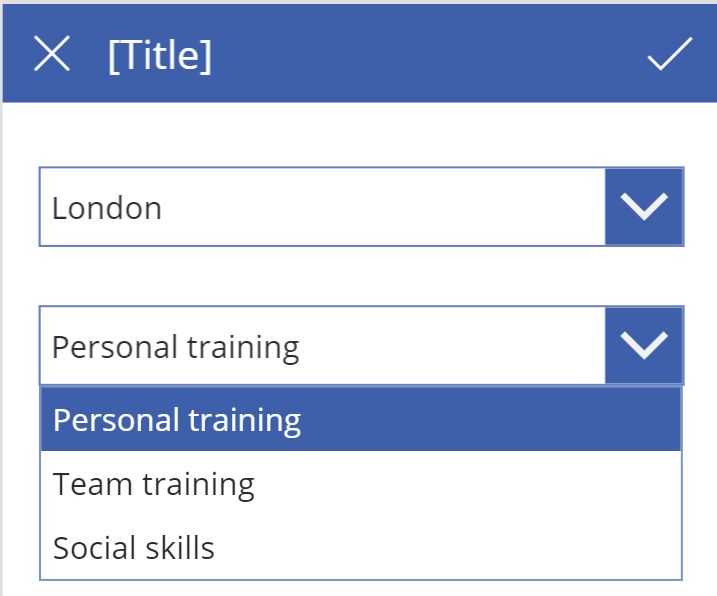
Figure 14 – select a location and see the training items listed
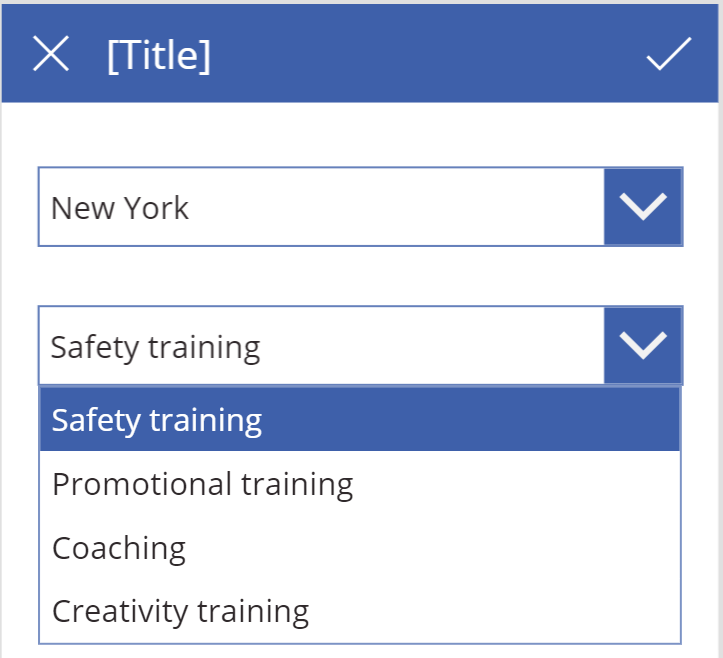
Figure 15 – select another location and see the training items listed for that specific location
All right, the cascading drop downs are working!
Last things to do are:
to add the Schedule date field and
save it all back to SharePoint.
And this is why I choose a new Form screen in the beginning, we’re going to use this now to make the saving back to SharePoint work. Of course a new Form can be added to a screen all the time.
As the form displays it isn’t connected to any data yet.
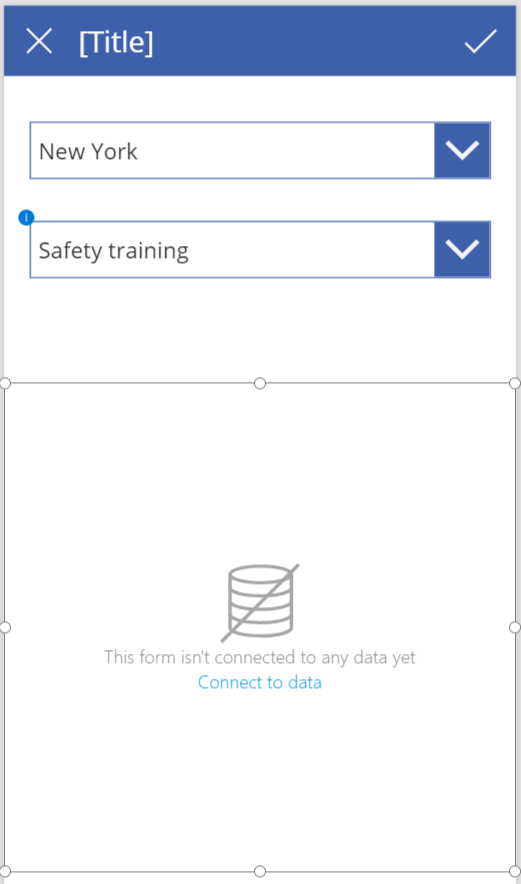
Figure 16 – form not connected to any data
Since the Schedule list was already added as a data source, the form can connect to it by setting the ‘DataSource’ property to ‘Schedule’.
In the right pane ‘Form customization’ the layout and fields to show in the form can be chosen.
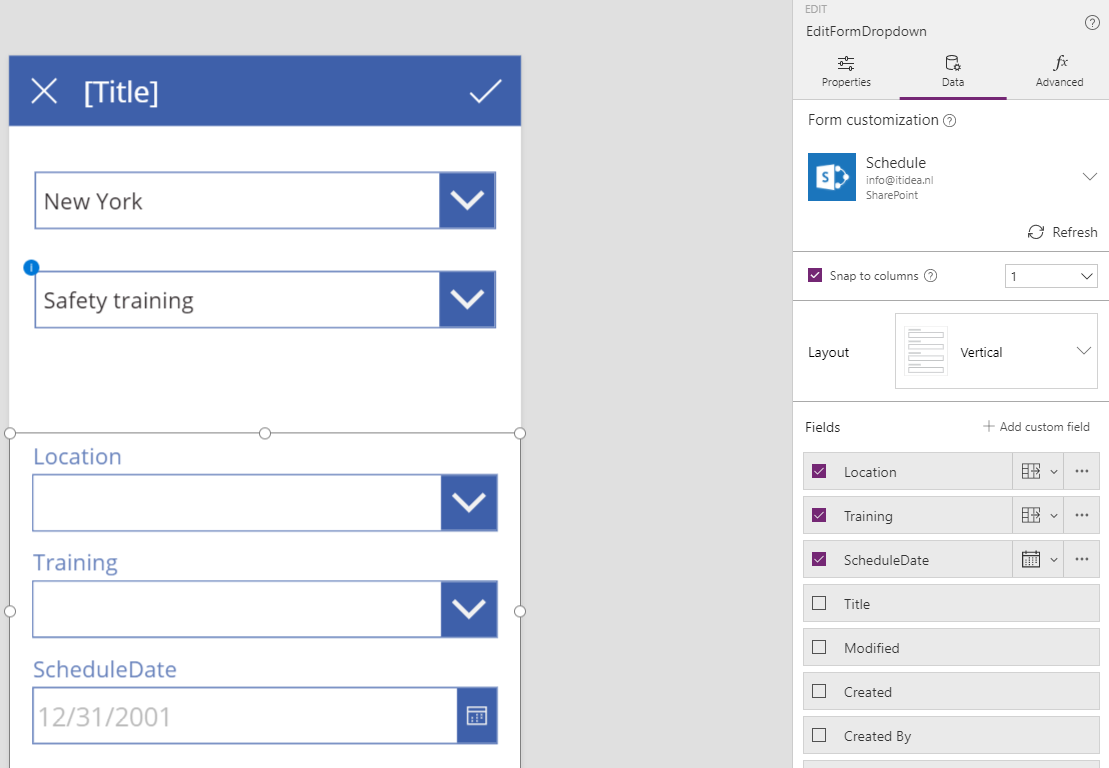
Figure 17 – Form customization
To save the data back to SharePoint we’re going to set the Location and Training values in the EditForm to the same values as the cascading drop downs at the top of the screen have.
To do so select the Location data card in the Form and update the ‘Default’ property to
{‘@odata.type’ : “#Microsoft.Azure.Connectors.SharePoint.SPListExpandedReference”,
Id:DropdownLocation.Selected.ID,
Value:DropdownLocation.Selected.Title
}
For choice and lookup fields this is the way to save the field back to SharePoint.
@odata.type : has to have value #Microsoft.Azure.Connectors.SharePoint.SPListExpandedReference
Id : for lookup it’s the column id in the list
Value : the value of the field shown in the lookup
As you may notice you can’t update this property…
Therefor you have to unlock the data card by selecting the icon or text ‘Unlock to change properties’.
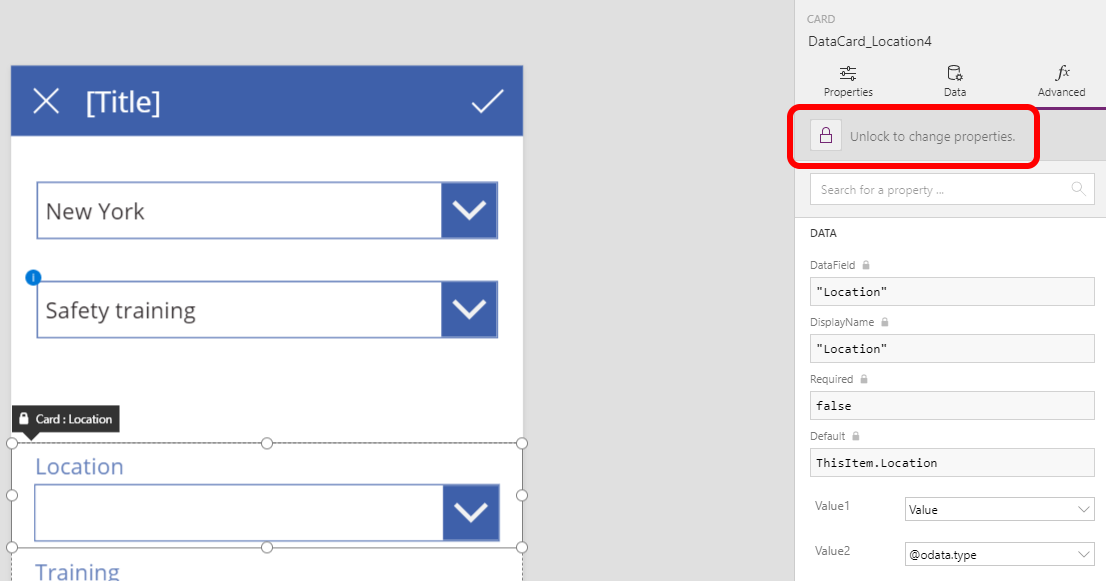
Figure 18 – unlock the data card
Now update the Default property.
If you did it right the value in the drop down in the Form updates immediately.
Do the same for the Training field.
Then the controls in the EditForm can be hidden to show only the ScheduleDate field and that’s it!
Hit the Preview button again, select a Location, Training, fill in a ScheduleDate and press the ‘Submit item’ button at the top right of the screen.
If you don’t see the ScheduleDate field set the Form in New mode, it probably is in Edit mode now.
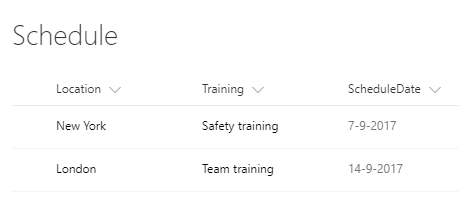
Figure 19 – Schedule list update from PowerApp
Summary
In this post I showed you how to create cascading drop downs and how to save this back to SharePoint. It contains a few caveats, but it’s quite doable.
Anita – thank you for your post. I followed your example for my sharepoint list and powerapp, and everything is working well except for when I go to submit to the sharepoint list. Then i get the following message:
“The requested operation is invalid. Server Response: A value must be provided for item. clientRequestID: ……………………
Any suggestions on how to find out why I am getting this error?
Thanks,
Nicd post. It was very helpful in understanding how to implement cascading dropdown.
Nice post, but is it possible to configure, if the value not in list. users can add new value within the new form (pop-up), than the new created value will auto selected in the list.
Thanx, helped me, but was not completely correct in my experience:
DropdownLocation.Selected.ID was not available, DropdownLocation.Selected.Value
So I had to do a LookUp for the ID
If you have multiselect dropdown values and you want to have conditional visibility you can use the following condition in visible property of that Card or whatever,
If(CountIf(DataCardValue.SelectedItems,Value=”Selection Required”)>0,true,false)
LocationLookup.Id not working for me. I tried also using creating site column as a lookup column but it is also not work for me. Powerapp not allowing to for “.Id”. let me know if you can help me? Thanks
can you please define me how can i set dropdown value in button click powerapps
thanks for the Article. I did a different approach and it work. I use same Edit form. In the Item property of Training drop down I just put below code. Which save lot of work.
old code : Choices([@Schedule].Training)
New code : Filter(Choices([@Schedule].Training),Value in Filter( training, LocationLookup.Value = ddlLocation.Selected.Value).Title)
Where ddlLocation is the Location drop down in the screen.
Hi there, I made a cascading dropdown in power app using share point list and it is working fine. But I need to implement a search property also in cascading dropdown. Would you please help me